Friday, July 28, 2017

How to Organize Years of Photos Without Getting Overwhelmed

This week, Close To My Heart shared some fantastic information on how to organize years of photos and not get overwhelmed in the process. I wanted to share this information with you as well, because it is SO important to get those photos out of boxes, off the computer, or even out of the camera, and into our lives to enjoy!

How to Organize Years of Photos without Getting Overwhelmed

When it comes to scrapbooking, one of the biggest hold-ups for people is feeling overwhelmed with organizing their photos. If you have years of photos piled up on your computer or photos spread between multiple devices, it can be easy to put off preserving your memories. The longer you wait to organize your photos, the more overwhelming it will become—so now is the time to start!

Because we believe in the importance of memory keeping, we want to help make the task easier, so today we’re going to walk you step-by-step through how to efficiently organize your digital photos for scrapbooking. It’s a process that may take some time, but which will be well worth it when your memories are all in order!

Step One: Consolidate Your Digital Photos

Upload all of your digital photos to one location on your computer. We recommend using a photo managing system, like Google Photos or iPhotos, to easily transfer photos from your phone onto your computer. If you haven’t transferred them already, go through the photos on your phone, your camera, and upload them all to this one location.

Step Two: Eliminate Unwanted Photos

Once you have all of your photos in one place, go through and eliminate any that aren’t worth keeping: repeats, photos with a blurry finger covering half the lens, photos of your to-do lists, etc.

Tip: Moving forward, make it a habit to do a Daily Delete—every day, go through the photos on your phone (or camera if you took pictures on it that day) and delete any of these types of photos. It will take you two seconds and save you tons of time down the road. You’ll be able to skip step two entirely in the future!

Another tip: Use the time traveling home from a vacation to do your deleting. That way when you get home, you’ll have already eliminated all the photos from your trip you don’t want to keep. Plus, it’s a fun way to relive those memories again while you’re heading home.

Step Three: Organize Your Digital Photos

In your photo managing system, create folders for each month and year. Then place the corresponding photos in these folders.

Step Four: Back-Up Your Digital Photos

Back up all the photos in your photo managing system onto a CD or external hard drive. You can also look into online options, such as iCloud, Dropbox, or Google Drive.

Step Five: Create To-Print Folders

Once you have organized your photos in your photo managing system, you’re ready to start thinking about scrapbooking them—woohoo! Even though all the photos you have left are photos you have deemed worth keeping, you may not want to scrapbook all of them. A great way to figure out which photos you want to scrapbook is to copy and paste a given folder onto your desktop. Then go through and delete any photos you don’t want to print. You can also edit any of the photos you’re going to print if you want to take that extra step.

Step Six: Upload & Print Photos

Once you’ve gone through all the photos on your desktop folder, you’re ready to print! We recommend creating a table, like the one below, to track each folder’s progress. When you have printed your photos, you can delete the desktop folder you created (remember, you’ve already saved these photos elsewhere!)

Tip: Choose one day every month to do a print run. Some months you may be able to afford printing more photos than other months, but get in the habit of printing your photos on the same day each month.

Step Seven: Organize Printed Photos

Option 1: Option 1: Use our large organizers and tabbed dividers to organize your printed photos.

You can organize your photos by date, person, event …whatever you want! Think about the album you want to create with the photos, and organize them that way.

Option 2: Create a work-in-progress album. Use one of our D-ring albums and divided Memory Protectors™ to separate out all the photos you’ll want for an album. You can group like photos together so you know how to plan your layouts.

And that’s it! The next step is to start scrapbooking away! If the idea of scrapbooking itself overwhelms you, a great place to start is with our Workshops Your Way® scrapbooking kits. You can also contact me to help you know where to start.

We hope this post helped you feel empowered to start organizing your photos for scrapbooking. We know that when you take that leap of faith, you’ll find so much joy and satisfaction in preserving your family’s memories and stories.

Have additional tips for organizing and printing your photos for scrapbooking? Share them in the comments below!

Friday, July 7, 2017

This and That

This post contains affiliate links and I will be compensated if you make a purchase after clicking on my links.

Happy Friday everyone!

I hope everyone had a wonderful 4th of July and was able to spend some time with family and friends enjoying the fireworks. Living in a state where fireworks are illegal, we get to enjoy the show put on by the city that evening. We don't have to listen to them for a month before and a month after.

We still had some fires started by the use of illegal fireworks and from dry lightening. I can't express how much I appreciate all the fire crews out keeping us safe during this fire seasons. Thank you!!

As we roll-on into summer I just have a few items I wanted to share with everyone.

CLOSE TO MY HEART

Close To My Heart is winding down their annual catalog and many items will be retiring as of July 31st. You can see the full list of discontinuing items HERE! Be sure and get what you want now before it is gone.

A few items will have a price increase starting August 1st, so you might want to grab them now before the price increases (scissors, organizer totes, memory protectors, re-inkers to name a few.)

Coming Soon...

The New 2017-2018 Annual Inspiration Catalogs will be out on August 1st as well!

CRICUT

Cricut is having their Christmas in July Sale. You can find great deals on supplies, totes and machines!

So after you stock up on all the crafting supplies and tools you need, what summer projects are you going to be working on? I would love to hear all about them.

Happy Crafting....

Monday, July 3, 2017

Happy Fourth of July!

I hope everyone has a safe and happy Fourth of July and that you are able to enjoy it with family and friends.

Wednesday, June 28, 2017

What Can You Do With Your Cricut Explore?

This post contains affiliate links and I will be compensated if you make a purchase after clicking on my links.

I have had my Cricut Explore Air II for about 9 months now, and I haven't even begun to scratch the surface on all the fun things I can do with it. So Far, I have cut out some cute cards and die cuts from paper, and a few vinyl wall decals. But what all could I be doing?

First thing to note: Cricut Explore machines are not food safe, and cannot cut fondant or similar materials.

PAPER

The first thing I did with my Cricut Explore, was cut Paper. You can cut all kinds of paper... Standard, Cardstock, Vellum and Poster Board. This makes creating very easy. You can cut paper for cards, pendants, signs, school projects, planner pages, home décor... almost any project you can think of that uses paper.

VINYL

You can easily cut Vinyl - Standard, Premium, Dry Erase, and Chalkboard. Much like paper, you can create a never-ending supply of projects using vinyl, such as wall art, decals for windows, doors, mugs, lunchboxes, etc. Plus it comes in so many great colors. There are even three shades of Holographic vinyl too.

One other thing you can use vinyl for is cutting out stencils to use for etching. I have made a few items by cutting out the words or design in vinyl and using the negative portion of the vinyl images to place on my item as a stencil. Then I use the etching cream to etch the design on my item. We made some really cute beer steins for the High School Band Oktoberfest fundraiser. Unfortunately, I didn't get a picture of any of the steins before they were gone.

IRON-ON (HEAT TRANSFER VINYL)

One of my new favorite things to use my Cricut Explore for is cutting out Iron-on's for sweatshirts. You can create and design your own logo's and images to use on cloths or bags. I even put my intial on my new Cricut Bags (so I don't lose them when I'm at events with other crafters.) Using the Cricut Heat Transfer Vinyl (HTV) is so simple and the finished product looks amazing.

The HTV comes in a rainbow of colors. It also comes in foil and glitter too!

CRAFT MATERIALS

You can also use Craft Materials, such as Washi Tape, Craft Foam, and Glitter Paper. This adds amazing detail and depth to all your crafting projects. Upcycled Materials such as Chipboard, Cereal Boxes and even Aluminum Cans. How many cute uses can you come up with for these items? Cricut makes Washi Sheets so you can cut out whatever shape or size you want, not just strips anymore. Plus a ton of cute colors. My mind is spinning now.....

PLASTIC AND THICK MATERIALS

Explore can cut Plastic such as Stencils, Window Acetate and Silicone. It can even handle Thick Materials such as Leather, Balsa Wood, Magnet Materials. I haven't tried this yet, but sounds promising.

FABRIC

You can use your Explore to cut Fabrics - Felt, Denim, Polyester, Burlap, Canvas. The possibilities here are endless. If you're a multimedia crafter, you definitely need a Cricut Explore! Check them out HERE!

Cricut has a wonderful resourse page loaded with information to help you know how to cut all these things with your machine. You can find out everything from mat type to pressure or blade settings HERE.

I started a Facebook Group called CRICUT EXPLORE FOR NEWBIES. It is a closed group designed for members to be able to share projects and ideas, but also ask questions and get feedback from fellow crafters who are still new to Cricut Explore without feeling intimidated or overwhelmed. If you think this is something you could benefit from, or you might have ideas/tips or tricks to share, please join us.

Thursday, June 22, 2017

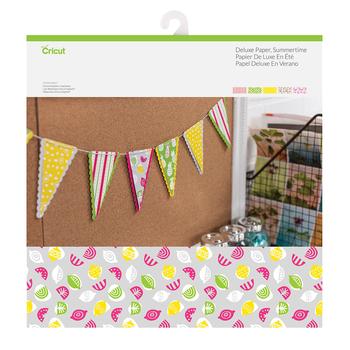
New Cricut Paper Available

**This post contains affiliate links and I will be compensated if you make a purchase after clicking on my links.

Cricut has done it again!

They have just come out with new paper packets in wonderful new themes... Disney, Marvel, Disney Princesses, Hello Kitty, and a so many more.

Check them all out HERE!

These are just a few of the fun new papers:

Wednesday, June 21, 2017

New Spin on Old Techniques

Like the world of fashion, trends in paper crafting are always changing. One day it’s all about brads and buttons and the next it’s all about sparkles and shimmer!

Just because an artistic technique or aesthetic may no longer be “on trend” doesn’t mean that you can’t still use it. You just need to freshen it up!

To show you what we mean, we dug through our archives to find artwork created with some old-school techniques. We then asked our artists to create new artwork using these same techniques…with a modern-day spin!

They’ve come up with some amazing alterations to these techniques that will make your artwork amazing!

Old Technique:

Distressing the edges of your titles with ink. Remember when we did this for everything? Distress all the things!

New Spin:

Instead of distressing your titles, try stamping them using the rock n’ roll technique. It keeps your edges clean, which is the new trend, but just like distressing, it gives your titles dimension and color variation.

Old Technique:

Ripping and inking your edges, aka, making your artwork look like it’s 100 years old. And remember how burned edges were such a thing? Ripping and inking your edges with black ink mimicked that trend, which you can see on the card below.

New Spin:

Instead of inking your ripped edges, try leaving your ripped edges un-inked and inking your clean edges instead, using a color other than black or brown! The key is subtlety! You can see we added some faint pink inking to the edges of the pink paper here. It helps to add some depth to the paper without screaming “I’m distressed!”

Old Technique:

Stippled titles. Remember this one? You’d spell out your title with stickers, make a million little dots over the stickers with a marker, and then peel off your stickers to reveal your finished title.

New Spin:

Watercolored titles. Instead of stippling over your stickers with a marker, paint over them with a wide paintbrush and some watercolor paint. We used this technique with a “hello” sticker from our Springtime Complements to create the title below.

Pretty neat, right?

Just because papercrafting trends change doesn’t mean you need to throw out your bag of tricks. All you need to do is find a way to make your old tricks feel new again!

Which spin is your favorite? Tell us in the comments below!

Recipes

4 ¼” x 5 ½” Welcome Baby Card (Horizontal)

C1668 My Acrylix® Baby Bundle Stamp Set, X7219B Little Dreamer Paper Packet, 1385 White Daisy Cardstock, 1292 Crystal Blue Cardstock, Z2841 Glacier Exclusive Inks™ Stamp Pad, Z2895 Lagoon Exclusive Inks™ Stamp Pad, Z3189 White & Gold Ribbon, Z3247 Simple Chevron Embossing Folder, Z3285 Cricut® Flower Market Collection, Embossing Machine

Cricut® Shapes:

Flower Market

1″ Shift+Title (?) (p. 8)

1 ½” Shift_Title (R) (cut 4, p. 14)

4 ¼” x 5 ½” Happy Birthday Card (Vertical)

B1537 My Acrylix® Birthday Sparkles Stamp Set, X7219B Little Dreamer Paper Packet, 1385 White Daisy Cardstock, Z2840 Thistle Exclusive Inks™ Stamp Pad, Z2896 Smoothie Exclusive Inks™ Stamp Pad, Z3189 White & Gold Ribbon, Z3312 Gold Glitter Gems, Z3285 Cricut® Flower Market Collection

Cricut® Shape:

Flower Market

2 ¼” Flower-2 (7) (p. 7)

12″ x 12″ Hello Page

CC1219 Swirly Seashells Stamp + Thin Cuts, x7221B Prickly Pear Paper Packet, Z3254 Enchantment Fundamentals Paper Packet, 1385 White Daisy Cardstock, Z3146 Watercolor Paper, Z3271 Archival Black Exclusive Inks™ Stamp Pad, Z3307 Springtime Complements, Z3216 White Twine, Z3089 Grey Enamel Gems, Z3132 Watercolor Paints, Z3188 Paintbrush Set, 3505 Watercolor Pencils, Z3285 Cricut® Flower Market Collection, Pen

Cricut® Shape:

Flower Market

2 ½” Flower-2 (7) (p. 7)

Wednesday, June 14, 2017

3 Ideas for Scrapbook Cover Pages

Every scrapbook album needs a front cover page and a back cover page…but sometimes it’s hard to know how to summarize your album! After all, you only have two pages, one at the front and one at the back, to explain what the entire album holds!

If cover pages have you stumped, don’t worry—we’ve got you covered! Here are three fail-proof ideas for creating amazing cover pages!

In Great Shape!

Attach a large shape to the center of your base page. Then position your title and photos over this shape. Even if you have multiple photos (there are have five here!), your page will still feel like a cover page because the large shape in the background creates a central focus. Pretty neat trick, right?

Easy As 1-2-3!

Simply attach three photos horizontally across the center of your page. Then add your title directly above or below these photos. Three is the key here! It’s a balanced number that draws the eye in.

Keep It Simple, Silly!

When all else fails, find a photo that sums up your album, and center it on your page along with a prominent title.

One fun spin on this approach is to center your photo but then place the title on the left side of your page, either vertically or horizontally!

Overall, the secret to creating a strong cover page is to draw the eye in to a central point with your pictures and title. If you keep that in mind, then you’re off to a great start!

And while you’re working on your cover pages, be sure to grab some albums because they’re on a great sale! For the month of June, you can buy one album and then get a second one at half price!

RECIPES:

12″ x 12″ The Woods Page

B1484 My Acrylix® Jennifer’s Hand Stamp Set, D1702 My Acrylix® Capture This Stamp Set, X7221B Prickly Pear Paper Packet, Z3254 Enchantment Fundamentals Paper Packet, 1385 White Daisy Cardstock, X5789 Sea Glass Cardstock, X5788 Raspberry Cardstock, Z2848 Sapphire Exclusive Inks™ Stamp Pad, X7221C Prickly Pear Complements, Z3324 Prickly Pear Sequins, Z3132 Watercolor Paints, Z3188 Paintbrush Set, Z3167 Cricut® Artistry Collection, Sewing Machine, Thread

Cricut® Shapes:

Artistry

1 1/4″ (font) “Woods”

12″ x 12″ Let’s Go Back Page

B1484 My Acrylix® Jennifer’s Hand Stamp Set, X7221B Prickly Pear Paper Packet, Z3254 Enchantment Fundamentals Paper Packet, 1385 White Daisy Cardstock, X5789 Sea Glass Cardstock, X7221C Prickly Pear Complements, Z3167 Cricut® Artistry Collection

Cricut® Shapes:

Artistry

1″ (font) “Let’s Back”

12″ x 12″ Dallin & Sarah Page

X7221 Prickly Pear Paper Packet, Z3254 Enchantment Fundamentals Paper Packet, X7219B Little Dreamer Paper Packet, 1385 White Daisy Cardstock, X5788 Raspberry Cardstock, X7221C Prickly Pear Complements, Z3314 Black & White Dots, Z3167 Cricut® Artistry Collection, Sewing Machine, Thread

Cricut® Shapes:

Artistry

1 1/4″ (font) “Dallin & Sarah 2017”

12″ x 12″ Hello World Page

B1484 My Acrylix® Jennifer’s Hand Stamp Set, X7221B Prickly Pear Paper Packet, X7219B Little Dreamer Paper Packet, Z3263 Uptown Fundamentals Paper Packet, 1385 White Daisy Cardstock, X5788 Raspberry Cardstock, X5763 Smoothie Cardstock, X7221C Prickly Pear Complements, Z3257 Thin Cuts—Love, Z3167 Cricut® Artistry Collection, Sewing Machine, Thread

Cricut® Shapes:

Artistry

1/2″, 3/4″, 1″, 1 1/4″, 1 1/2″, and 1 3/4″ Icon-1 (k) (cut 5 of each, p. 28)

1 1/2″ (font) “Class of 2017”