Tuesday, December 9, 2014

New Rolling Tote and Shoulder Bag

Just in time for Christmas..... Close To My Heart has released the new rolling tote and shoulder bag. I can't believe how cute they are and SO functional too.
They offer lots of storage for your CTMH plastic organizers plus pockets for 12x12 items and supplies. I am sure these will be a big hit and go quickly. Don't delay, order now if you want them before Christmas!

Friday, October 10, 2014

October Stamp of the month

Have you seen the super cute October Stamp of the Month - Home For The Holidays? I just love this Polar Bear.
This stamp set is perfect for making cards or gifts. In less than 30 minutes, I was able to create this cute little box. It's perfect for sharing some holiday treats.
I used the Artiste Cricut Cartridge to cut the box out, and the Art Philosophy Cartridge to cut the tags. I used a printed sheet from the Sparkle and Shine Paper Pack to make the box. This particular paper is discontinued, but it would look great with Yuletide Carol or Snowhaven too.

I used three shades of ink and the coordinating Cardstock for the tags - Juniper, Ruby and Slate. From there just some adhesive and scissors to trim a strip of ribbon was all that was necessary.

It's not to late to get your own Home For The Holidays stamp set. It's only $5 with any $50 order placed in October. But it's only available through October, so don't delay order now

Thursday, October 2, 2014

Ribbon Rewards

During the month of October, with each qualifying purchase of $50 USD/$55 CAD you are eligible to receive—as a special bonus—one of two chevron ribbons FREE! Each chevron ribbon—Ruby or Outdoor Denim—has an original retail value of $6.95 USD/$7.75 CAD. So which ribbon will you get? It’s a surprise! Quantities are limited, so make sure to place your orders as early in the month as possible. Be sure to take advantage of this fantastic offer so you can enjoy embellishing your creations with your own surprise roll of bonus ribbon! Supplies are limited so order soon.

Shop here

Tuesday, September 23, 2014

Happy First Day of Fall

It's Fall, my favorite time of the year. I love the crispness in the air, the cooler evenings and all the fun Harvest Time events going on this time of year. Though I hate raking up all the leaves, I do love playing in them and getting some great pictures of my son and the dog playing in them too. Plus the cooler evenings make me want to scrapbook all the pictures I will be taking. This picture isn't of my yard, but I just love the colors.
It is time to start the Holiday Season. For us, that means Halloween, Thanksgiving and Christmas. Not to mention all the extra events that pop-up this time of year. So, I decided to get organized early, and try to cut down on the last minute surprises. I think a Holiday Planner is just the ticket. What is a Holiday Planner you ask? It is a cute little booklet designed out of envelopes to help you organize and keep track of everything you need to get through the Holiday Season.
This is the front cover of my Holiday Planner. I used 3 larger envelopes (6x8). Each envelope is folded in half. You can use more envelopes if you need more planning space. I decorated with the Sparkle and Shine Paper Pack and Embellishments from CTMH. This particular Paper Collection isn't still available, but there are some great new collections that will work too.
The first section has two pockets, and the flap has been removed from the envelope. I put four cards with tabs on them into the pockets (2 on each side.) The tabs can be used for shopping or to-do lists, gift ideas, recipes, etc. I am thinking of adding a small monthly calender to each tab (Sept-Dec) just to help with the planning.
The middle section is an envelope with the flap still attached. I simple cut the flap in the middle and took out a small v-shaped area to allow it to open easier after being folded. This section is great for receipts, tickets, cards, or anything else that might need to be tucked in for safe keeping.
The last section is just like the first. Open pockets with 4 tabbed cards tucked in. If you don't need this many tabbed cards, you could just leave them out. If you used bigger envelopes, so that the pocket was bigger, you might even be able to tuck a few blank holiday cards or thank you notes in for quick access. A silk ribbon is secured across the back and front covers. The ribbon can be pulled to allow a pen loop on the spine. Then, tie the ends in a neat bow and your planner is all secure.
I think this simple planner could be used for lots of planning situations beyond just the holidays. If you would like the complete directions, please email me at lfaris68@gmail.com.
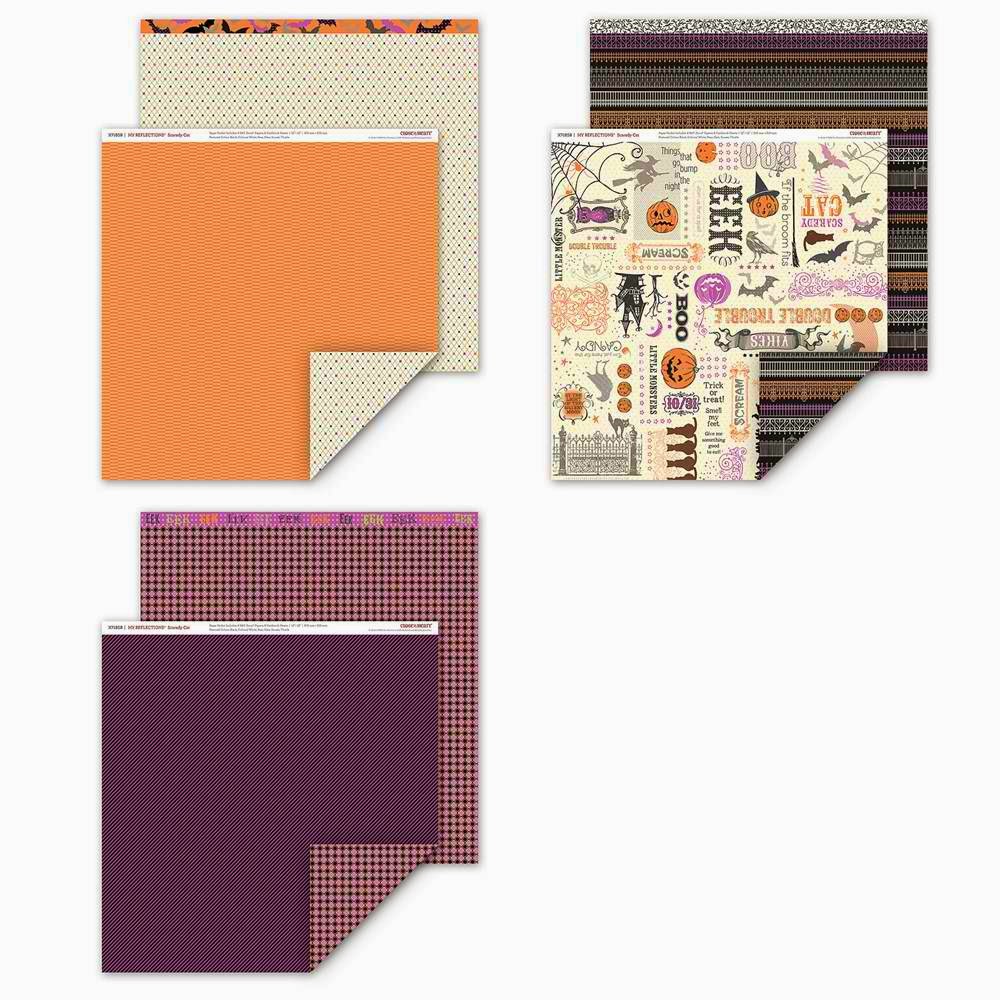
And don't forget time is running out to enter to win the Scaredy Cat Collection I am giving away on 9/30/14. Leave a comment below and let me know what you're working on and you will be entered.

Saturday, September 20, 2014

Who Doesn't Love A Little Bling

Bling is growing in popularity. Everything from jeans to fingernails can all be enhanced with bling these days. So, why not scrapbook pages or cards? Close To My Heart has a great line of Base and Bling for designing you own necklaces, bracelets and headband. But, why not use it on our paper crafting projects too? I love playing with the possibilities.
Here is an example, created by Donna Digby, of using one of the Scaredy Cat Embellishments on a Base Necklace to make a Halloween charm. This can be used on a chain as a necklace, or with ribbon on a page/card.
I think the bases and glass toppers would be gorgeous as Christmas ornaments on a scrapbook page or even as a charm on a card. I would love to see what you come up with too.
Don't forget, you can still get in on this months Giveaway of the Scaredy Cat Collection. All you need to do is comment on one of the September posts or place an order on my website www.lisafaris.ctmh.com

Tuesday, September 16, 2014

Halloween Treats

Halloween is creeping up so fast. It's time to start thinking of cute goodie ideas for my son's class party at school. I am loving the new Cut Above Halloween Treat Bag Kits from CTMH. The kit comes with all the supplies to make up 10 Treat Bags, you just add the candy of your choice.
If you like an idea that doesn't involve sugar, here are some Scary Cute Pencil Topper Ideas that any little Goblin would love.
Contact me today to schedule a home class, and you could earn this kit or stamp set FREE. If you just can't wait, you can shop for these cute ideas on my website at: www.lisafaris.ctmh.com

Monday, September 15, 2014

September Giveaway

In honor of my blog launch, I am having a giveaway in September. Be sure to leave a comment in September, and you are entered to win a Close To My Heart Scaredy Cat Collection. Let me know what your working on.

Sunday, September 14, 2014

The wait is over...

The new Artfully Sent Cricut Collection, from Close To My Heart, has arrived. I ordered mine today, and can't wait to start playing with it. This collection comes with the Cricut Cartridge containing over 700 images: cards and fonts, three D-size acrylic stamps sets and a package of the White Daisy Card Stock. Everything you need to start creating.
To view the collection or to purchase, visit www.lisafaris.ctmh.com

Thursday, September 11, 2014

September Again... Time For A Giveaway!

Wow, time seems to fly faster and faster every year. I can hardly believe we are almost half way through September. Where did the summer go? School has started and the weather is getting fallish here too. With cooler mornings, and the leaves changing colors, fall is my favorite time of year. I love the crispness in the air, sweaters and scarves, and all the harvest type festivals and activities. I also start feeling the need to snuggle in and work on craft projects. Time to scrapbook all the exciting summer pictures, prepare Halloween projects and start on the holiday cards. January is the traditional New Beginning, but for me it is September. So, that means time to prepare the school album for my son. This will be his first year in middle school, so I'm sure there will be lots of memories to capture. Then, on to some paper crafting for Halloween. I can't wait to tryout the new Scaredy Cat Paper Pack and Embellishments. I'm thinking of a paper wreath for inside. I will share my pictures as I finish it up, so stay tuned. Now, I think it is time for a Giveaway. Leave a comment below, telling me what your working on this month. I will pick one lucky winner on the 30th to receive their own Scaredy Cat Paper Pack and Embellishments Set. Happy Crafting!

Monday, September 1, 2014

Friday, August 29, 2014

Finished Mini Paper Bag Album

It took several tries, but I finally got the hang of the Mini Paper Bag Album. I started out using regular tan lunch sacks and my leftovers from the Arianna paper pack. Didn't love the finished look, and I did a lousy job with the spine.  So, I started over.


This time, I used a mix of miscellaneous papers I had on hand, that seemed to work together.  I used six of the tan lunch bags again.  The bags are 5" wide, and I cut the tops of the bags off to make the page 7 1/2" tall.


After that I created the small tags to tuck into the pockets.  I made mine 2  1/2" x 3".  Then larger tags that tuck into the actual bag at the top of the page. These are 7"x4".

I made a flap for one side of each bag.  I choice to have my flap on the back side of the bag, the side without the bottom folded up.  My flap was 5 1/2" wide and 7" tall.  I scored in 1" down the long side and used a liquid glue to attach the flap into the fold of the bag.

On the other side of the bag, I used the liquid glue to glue the bottom to the side of the bag and create a pocket. I decorated this side of the bag before I glued.

From here, I decorated all the pages and flaps.  All the pages are the same size, so you can cut each part of the page 6 times... Once for each page (bag).


Creating the spine was a bit tricky, and I got the info off YouTube.  I watched several videos and ultimately just sort of came up with my own happy medium.  Once I had a spine, I attached the bags to the spine using double-sided tape.  Attach the bag to the spine in the opposite fold of the bag from your flap.

The I added my cover and decorated my cover.  I added a ribbon to the front and back cover so I can tie the album closed.


Very fun to make and great for photos, cards, tickets, notes, etc.  A cute keepsake too.

I think I will get some colored craft bags and make a few more.  I can't wait to try this with black bags and the CTMH Yuletide paper packet and embellishments for a holiday album.  Coral or blue bags with the CTMH Seaside collection ...

Oh the choices. What can you come up with?


Friday, August 22, 2014

August Monthly Kit Club

It has been awhile since I posted. I am sorry for the delay, but I had some computer issues. I have learned I cannot post any pictures from my Iphone and have to use the old laptop for this. So, lesson learned I guess.

I have been completing my displays for my monthly kit club. I hold this the 4th Saturday of each month. For August, we are using the Chalk It Up Workshop On The Go from Close To My Heart. You can find this and all the Work Shop On The Go Kits on my website at www.lisafaris.ctmh.com

 I have designed two layouts besides the one offered in the kit.

This layout follows a school theme. The white spots are for photos and journaling.


This layout can be used for a school or non-school theme:


If you are interested in join our monthly club, leave a comment and I will get you all the information.

Sunday, August 10, 2014

Paper Albums

So this week I ventured out into Mini Paper albums. The ones I saw are made from paper sacks. I watched a youtube video by MySistersScrapper, and loved the idea.  I set out to create my own version. I used my scraps of the Ariana paper pack from CTMH, and gave it a try.  My first attempt was a bit rough, and I really should have used a full paper pack.   I have been playing with binding options now, and I was not very good at my first attempt but I can hopefully hide the flaws with the cover. I will have pictures here soon.

What other paper projects have you tried?  I am always looking for suggestions.


Saturday, August 2, 2014

Welcome

Welcome to my blog. I am a longtime scrapbooker who recently made the leap to stamping and card making.  I joined Close To My Heart for the wonderful products, and now I am hooked. I hope you will enjoy spending time with me while I share my adventures in scrapbooking and card making.  I will be updating my blog weekly with recent projects and ideas.  All my projects will use CTMH products.  If you find something you want, it will be available through my website. www.lisafaris.ctmh.com

I look forward to sharing and hearing from you along the way. Check back soon for my first official blog.